Key Takeaways
- CSS Pseudo-elements Module Level 4 specification defines several new pseudo-elements and clarifies the behavior of existing ones, but only a few are currently supported by browsers. These include ::before, ::after, ::first–letter, ::first–line, and ::selection.
- Pseudo-elements ::before and ::after can inject content into a document without it existing in the document source, while ::first–letter, ::first–line, and ::selection affect content that’s part of the document source.
- The ::before and ::after pseudo-elements can be used to add generated content to the document tree, such as indicating which form fields are required or adding a prefix or suffix to content.
- The ::first-letter pseudo-element can be used to create initial or drop-capital letter effects, and the ::first-line pseudo-element can be used to style the first line of a text block.
- The ::selection pseudo-element can be used to apply CSS styles to content that users have highlighted with their mouse, with only color and background-color properties having been implemented in multiple browsers.
The following is an extract from our book, CSS Master, written by Tiffany B. Brown. Copies are sold in stores worldwide, or you can buy it in ebook form here.
The CSS Pseudo-elements Module Level 4 specification clarifies behavior for existing pseudo-elements and defines several new ones. Only a few of these CSS selectors, however, have any degree of support in current browsers. Those are the ones we’ll focus on here:
::before-
inserts additional generated content before the content of an element
::after-
inserts additional generated content after the content of an element
::first–letter-
selects the first letter of an element
::first–line-
selects the first line of an element
::selection-
styles text selected by the cursor
Of these, ::first–letter, ::first–line, and ::selection affect content that’s part of the document source. The ::before and ::after pseudo-elements, on the other hand, inject content into a document without it existing in the document source. Let’s look at each of these pseudo-elements more closely.
Note: Single-colon Syntax
You may come across single-colon versions of ::first–letter, ::first–line, ::before, and ::after in old CSS. These pseudo-elements were defined in CSS2 with a single :. Though Internet Explorer 8 requires single-colon syntax, most other browsers support both versions. It is recommeded to use the double-colon syntax.
::before and ::after
Most pseudo-elements allow us to select content that’s already part of the document source—in other words, the HTML you authored—but not specified by the language. With ::before and ::after, however, matters work differently. These pseudo-elements add generated content to the document tree. This content does not exist in the HTML source, but it is available visually.
Why would you want to use generated content? You might, for example, want to indicate which form fields are required by adding content after its label:
/* Apply to the label element associated with a required field */
.required::after {
    content: ' (Required) ';
    color: #c00;
    font-size: .8em;
}
Required form fields use the required HTML property. Since that information is already available to the DOM, using ::before or ::after to add helper text is supplemental. It isn’t critical content, so it’s okay that it’s not part of the document source.
Note: Generated Content and Accessibility
Some screen-reader and browser combinations recognize and read generated content, but most do not. Avoid relying on content generated using ::before or ::after being available to assistive technology users. More on this is available in Leonie Watson’s piece “Accessibility support for CSS generated content.”
Another use case for ::before or ::after is adding a prefix or suffix to content. Perhaps the aforementioned form includes helper text, as shown here:
<form method="post" action="/save">
<fieldset>
<legend>Change Your Password</legend>
<p>
<label for="password">Enter a new password</label>
<input type="password" id="password" name="password">
</p>
<p>
<label for="password2">Retype your password</label>
<input type="password" id="password2" name="password2">
</p>
<p class="helptext">Longer passwords are stronger.</p>
<p><button type="submit">Save changes</button></p>
</fieldset>
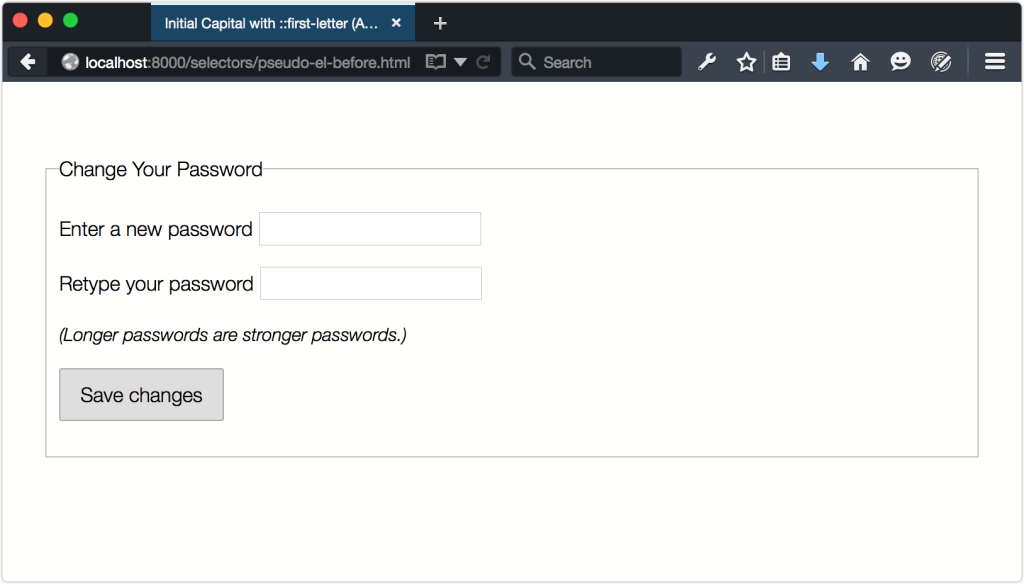
</form>Let’s enclose our helper text in parentheses using ::before and ::after:
.helptext::before {
    content: '( ';
}
.helptext::after {
    content: ')';
}
The result is shown below.
Perhaps the most useful way to use ::before and ::after is to clear floated elements. Nicolas Gallagher introduced this technique (which builds on the work of Thierry Koblentz) in his post “A new micro clearfix hack”:
/* Use :before and :after if you need to support IE <= 8 */

.clearfix::before,
.clearfix::after {
    content: " "; /* Note the space between the quotes. */
    display: table;
}
.clearfix::after {
    clear: both;
}
Add the clearfix class to any element that needs to be cleared after a floated element.
Both ::before and ::after behave just like regular descendants of the element to which they’re attached. They inherit all inheritable properties of their parent, and sit within the box created by their parent. But they also interact with other element boxes as though they were true elements. Adding display: block or display: table to ::before or ::after works the same way as it does for other elements.
Warning: One Pseudo-element per Selector
Currently, only one pseudo-element is allowed per selector. This means that a selector such as p::first-line::before is invalid.
Creating Typographic Effects with ::first-letter
While the ::before and ::after pseudo-elements inject content, ::first-letter works with content that exists as part of the document source. With it, we can create initial or drop-capital letter effects, as you might see in a magazine or book layout.
Note: Initial and Drop Capitals
An initial capital is an uppercase letter at the start of a text set in a larger font size than the rest of the body copy. A drop capital is similar to an initial capital, but is inset into the first paragraph by at least two lines.
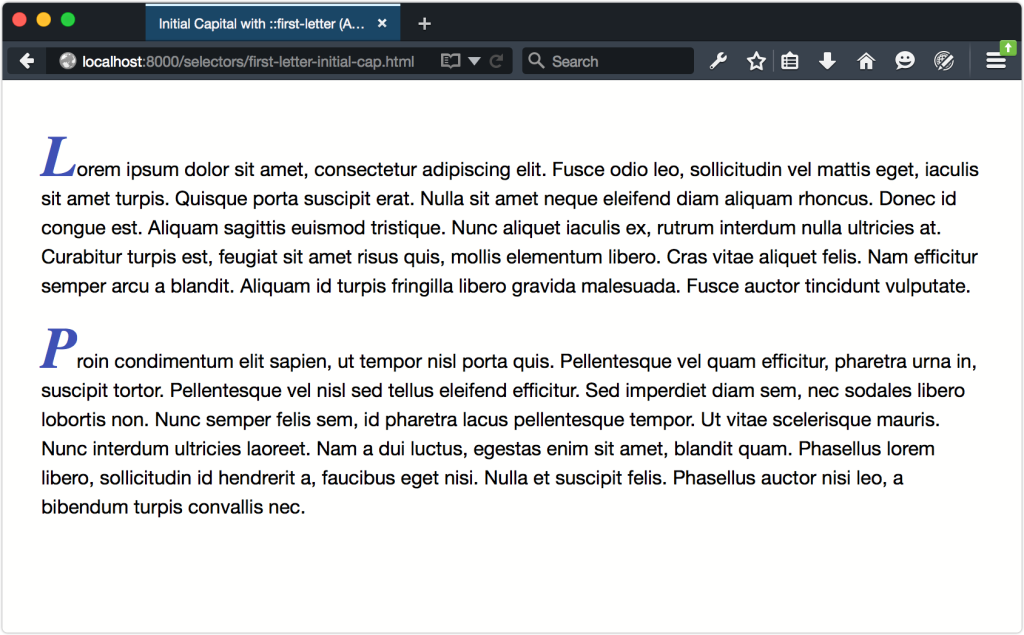
This CSS snippet adds an initial capital letter to every p element in our document:
p::first-letter {
    font-family: serif;
    font-weight: bold;
    font-size: 3em;
    font-style: italic;
    color: #3f51b5;
}
The result can be viewed below.
As you may have noticed from this screenshot, ::first–letter will affect the line-height of the first line if you’ve set a unitless line-height for the element. In this case, each p element inherits a line-height value of 1.5 from the body element.
There are three ways to mitigate this:
-
Decrease the value of
line-heightfor the::first–letterpseudo-element. A value of.5seems to work most of the time. -
Set a
line-heightwith units on the::first–letterpseudo-element. -
Set a
line-heightwith units on either thebodyor the::first–letterparent.
The first option preserves the vertical rhythm that comes with using unitless line-heights.[1] The second option limits the side effects of using fixed line-heights just to those pseudo-elements. Option three is the worst of these options because there’s a high likelihood that you’ll create a side effect that requires more CSS to override it.
In this case, let’s decrease the line-height value for p::first-letter to .5 (and rewrite our file properties to use the font shorthand):
p::first-letter {
font: bold italic 3em / .5 serif;
color: #3f51b5;
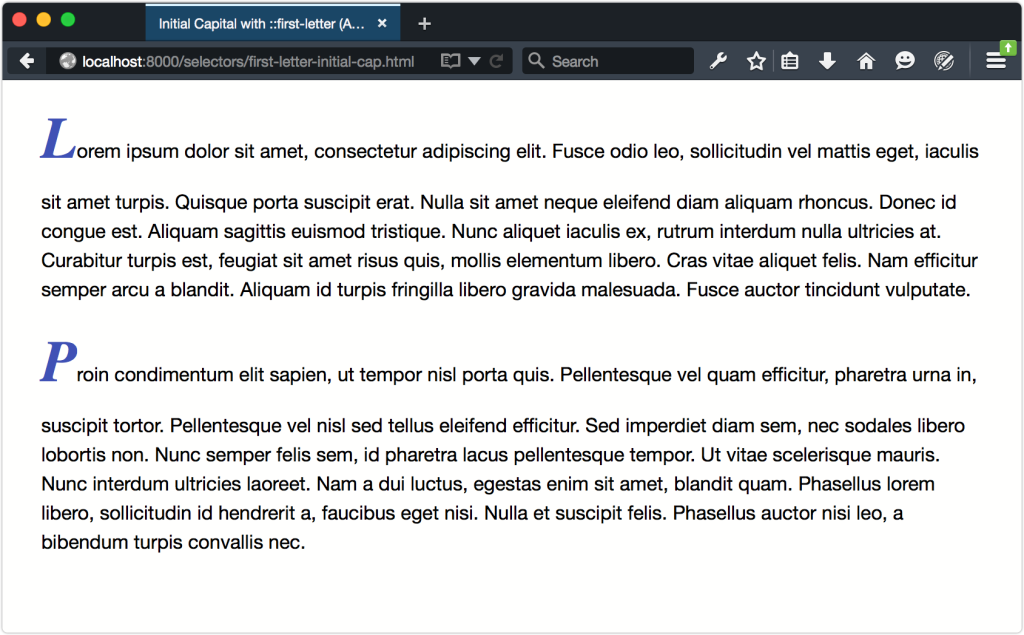
}This change produces the result shown below. Notice here that we also had to adjust the bottom margin of each p element to compensate for the reduced line-height of p::first-letter.
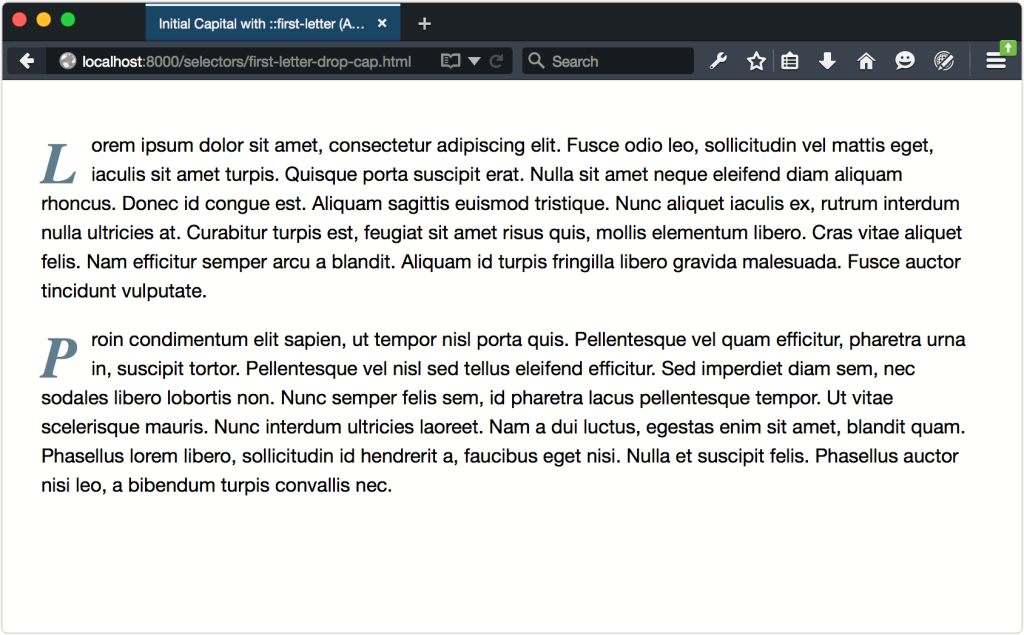
Creating a drop capital requires a few more lines of CSS. Unlike an initial capital, the adjacent text to the drop capital letter wraps around it. This means that we need to add float: left; to our rule set. We’ll also add top, right, and bottom margins:
p::first-letter {
    font: bold italic 3em / .5 serif;
    font-style: italic;
    color: #607d8b;
    float: left;
    margin: 0.2em 0.25em .01em 0;
}
Floating an element, or in this case a pseudo-element, causes the remaining text to flow around it, as illustrated below.
Be aware that ::first-letter can be difficult to style with pixel-perfect accuracy across browsers, unless you use px or rem units for size, margin, and line height.
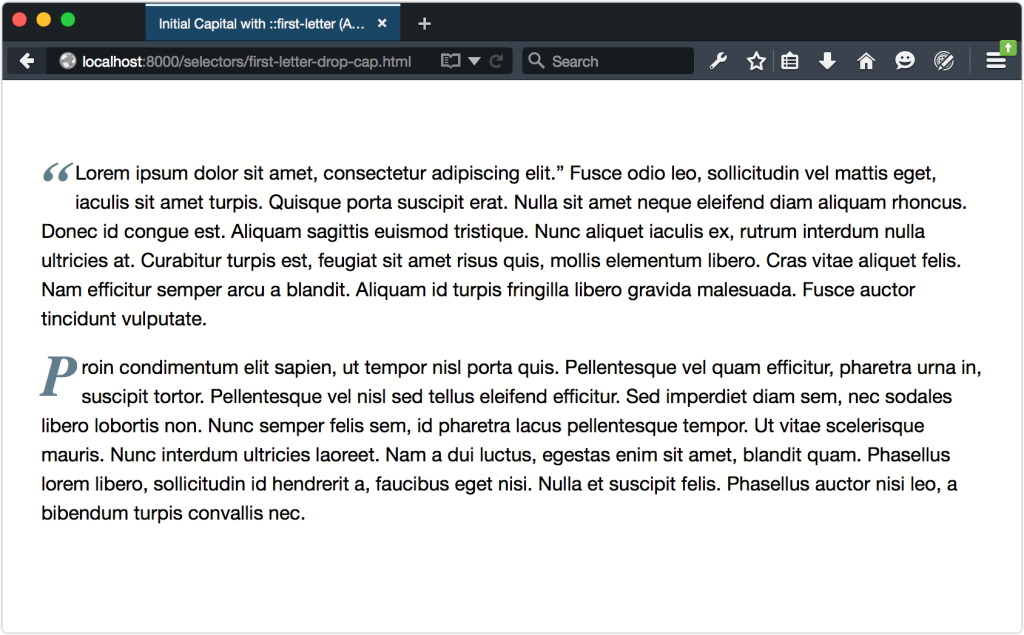
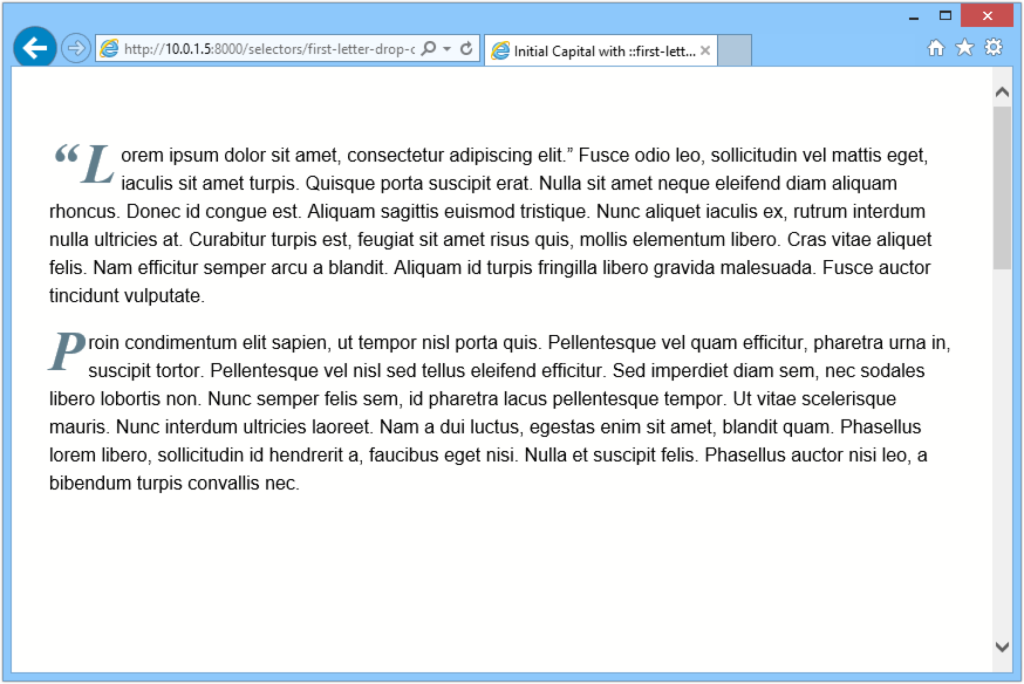
Sometimes the first letter of a text element is actually punctuation; for example, a news story that begins with a quote:
<p>“Lorem ipsum dolor sit amet, consectetur adipiscing elit.” Fusce odio leo, sollicitudin vel mattis eget, ...</p>In this case, the styles defined for ::first-letter will affect both the opening punctuation mark and the first letter, as presented below. All browsers handle this in the same way.

However, this isn’t necessarily how it works when the punctuation mark is generated by an element. Consider the following markup:
<p><q>Lorem ipsum dolor sit amet, consectetur adipiscing elit.</q> Fusce odio leo, sollicitudin vel mattis eget, iaculis sit ...</p>Current browsers typically render the q element with language-appropriate quotation marks before and after the enclosed text; however, not all browsers treat those quotation marks the same way. In Firefox 42 (shown below), Safari 8, and earlier versions, ::first-letter only affects the opening quotation mark.
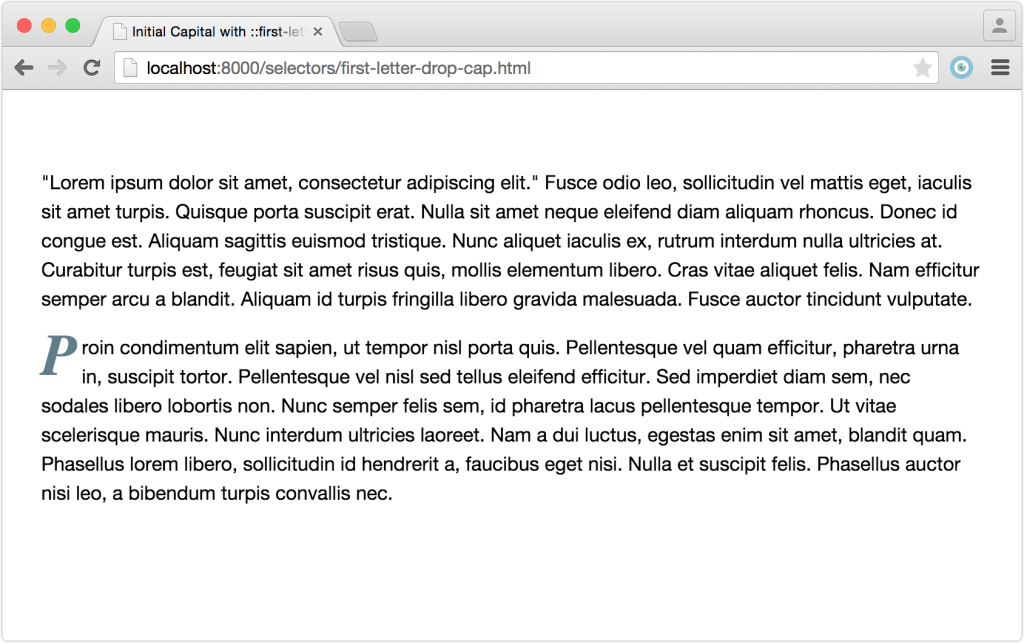
In Chrome, Opera, and Yandex, neither the opening quotation mark for q nor the first letter of the paragraph are restyled. The figure below shows how this looks like in Chrome.
Internet Explorer, however, applies first-letter styles to both the opening quotation mark and the first letter of the paragraph, as shown below.
According to the CSS Pseudo-elements Module Level 4 specification, punctuation that immediately precedes or succeeds the first letter or character should be included; however, the specification is unclear about whether this also applies to generated punctuation.[2]
Browser Bugs When Using ::first-letter
For the most part, ::first-letter works as expected across browsers. As with any CSS feature, there are some edge cases and browser bugs of which to be aware.
In Firefox 39 and earlier, some punctuation characters cause Firefox to ignore a ::first–letter rule set altogether:‑,$,^,_,+,`,~,>,<
::before and the content property, or included in the document source. There is no fix for this. You’ll need to avoid using these characters as the first character if you’re also using ::first-letter.
Note: Bugs in Blink-based Browsers
Some versions of Blink-based browsers will not apply ::first–letter rules if the parent element has a display value of inline or table. This bug exists in Chrome 42, Opera 29, and Yandex 15. It’s fixed in Chrome 44, however, which should be released by the time this book reaches your hands. If you need to work around this bug, the easiest fix is to add display: inline-block, display: block, or display: table-cell to the parent element.
Creating Typographic Effects with ::first-line
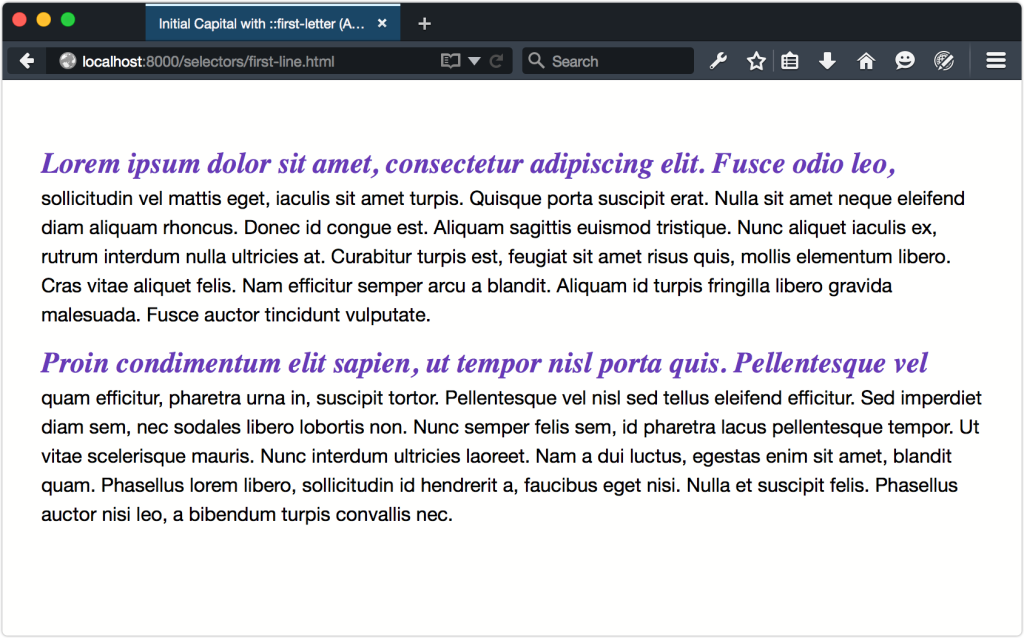
The ::first-line pseudo-class works similarly to ::first-letter, but affects the entire first line of an element. We could, for example, make the first line of every paragraph element be a larger text size and different color than the rest of each paragraph:
p::first-line {
    font: bold 1.5em serif;
    font-style: italic;
    color: #673ab7;
}
You can see the result below. Notice that the first line of each paragraph is affected, rather than the first sentence. How many characters fit on this first line is determined by font size and element width.
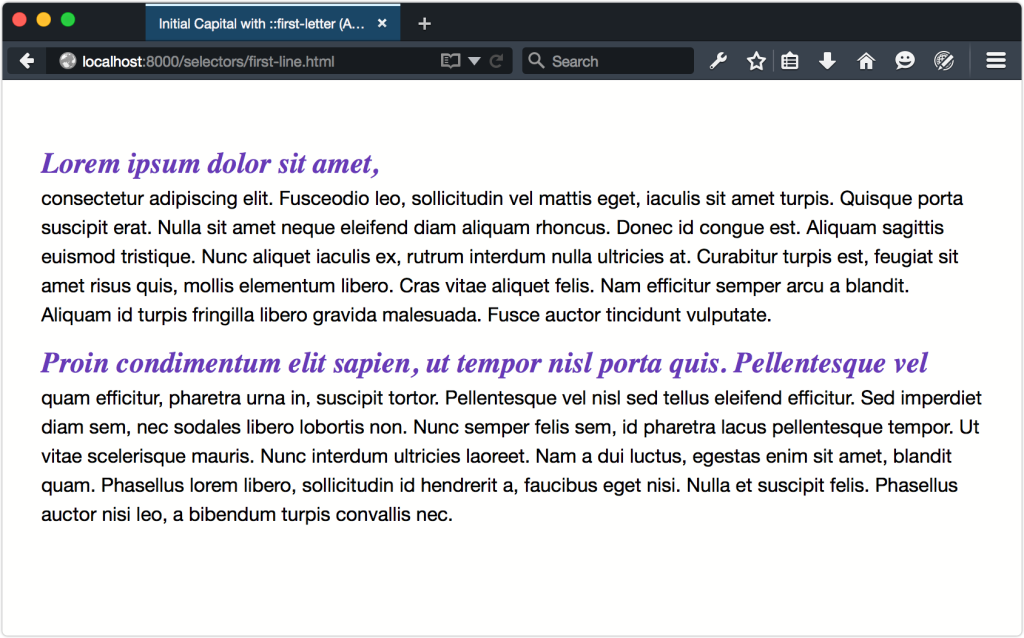
It is possible to force the end of a first line by using a br or hr element, as shown below. Unfortunately, this is far from perfect. If your element is only wide enough to accommodate 72 characters, adding a <br> tag after the 80th character won’t affect the ::first-line pseudo-element. You’ll end up with an oddly placed line break.
Similarly, using a non-breaking space ( ) to prevent a line-break between words won’t affect ::first-line. Instead, the word that sits before will be forced on to the same line as the text that comes after it.
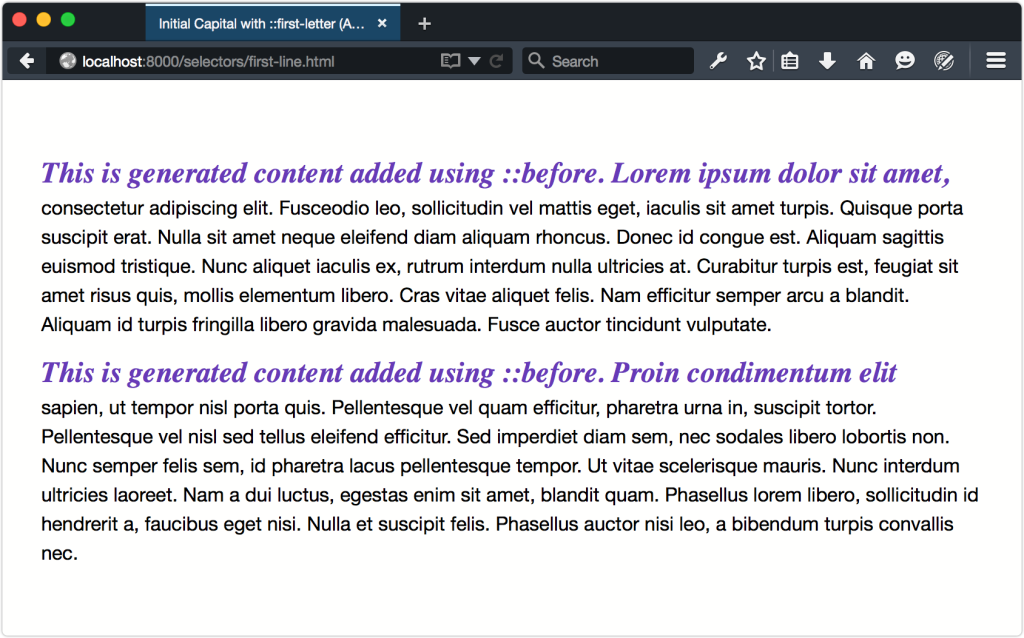
Generated content that’s added using ::before will become part of the first line, as shown below.
If the generated text is long enough, it will fill the entire first line. However, if we add a display: block declaration―for example, p::before {content: '!!!'; display: block;}―that content will become the entire first line:
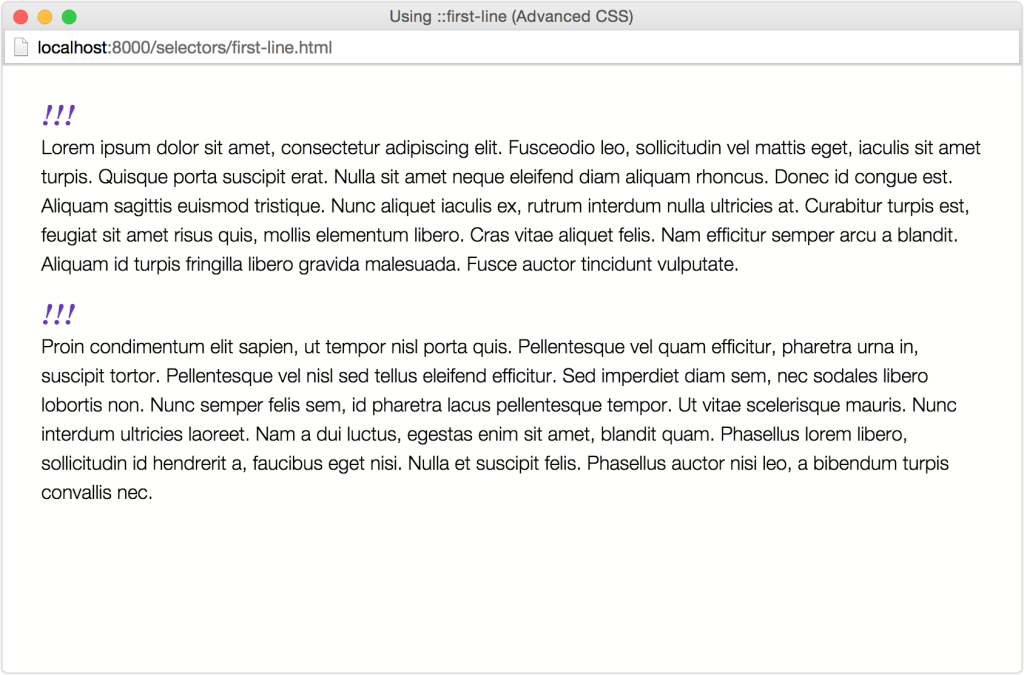
Unfortunately, this is yet to work in Firefox version 40 or earlier. Firefox ignores the rule set completely.
::selection
The ::selection pseudo-element is one of the so-called “highlight pseudo-elements” defined by CSS Pseudo-Elements Module Level 4. Formerly part of the Selectors Level 3 specification, it’s the only highlight pseudo-element implemented by browsers.[3]
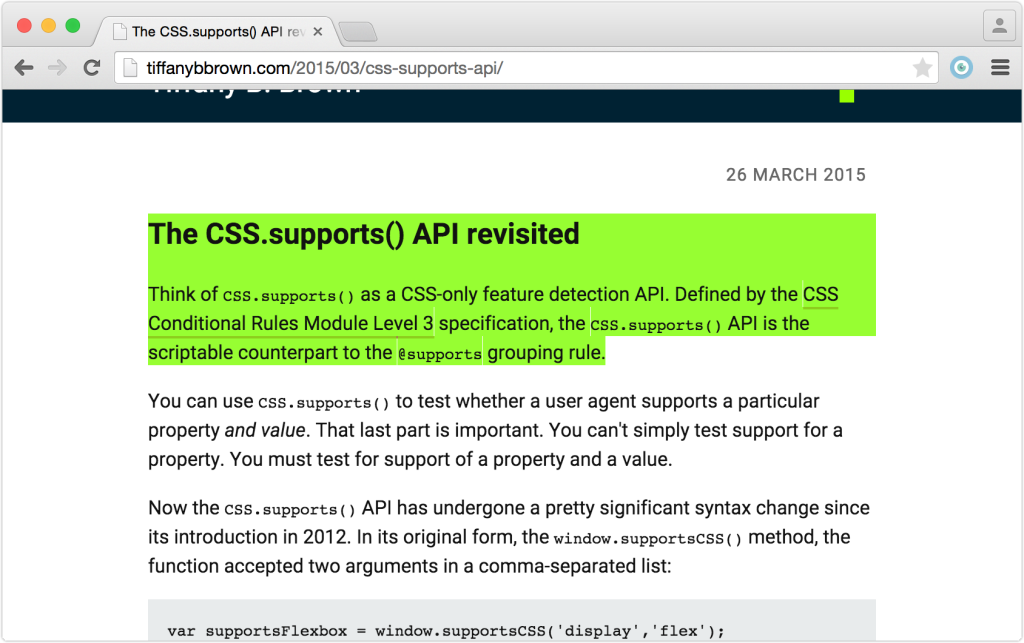
With ::selection, we can apply CSS styles to content that users have highlighted with their mouse. By default, the background and text color of highlighted content is determined by system settings; however, developers can change what that highlight looks like, as indicated below.
Not every CSS property can be used with ::selection. As outlined in the specification, only these properties will work:
-
color -
background-color -
cursor -
outlineand its expanded properties -
text-decorationand related properties (such astext-decoration-style) -
text-emphasis-color -
text-shadow
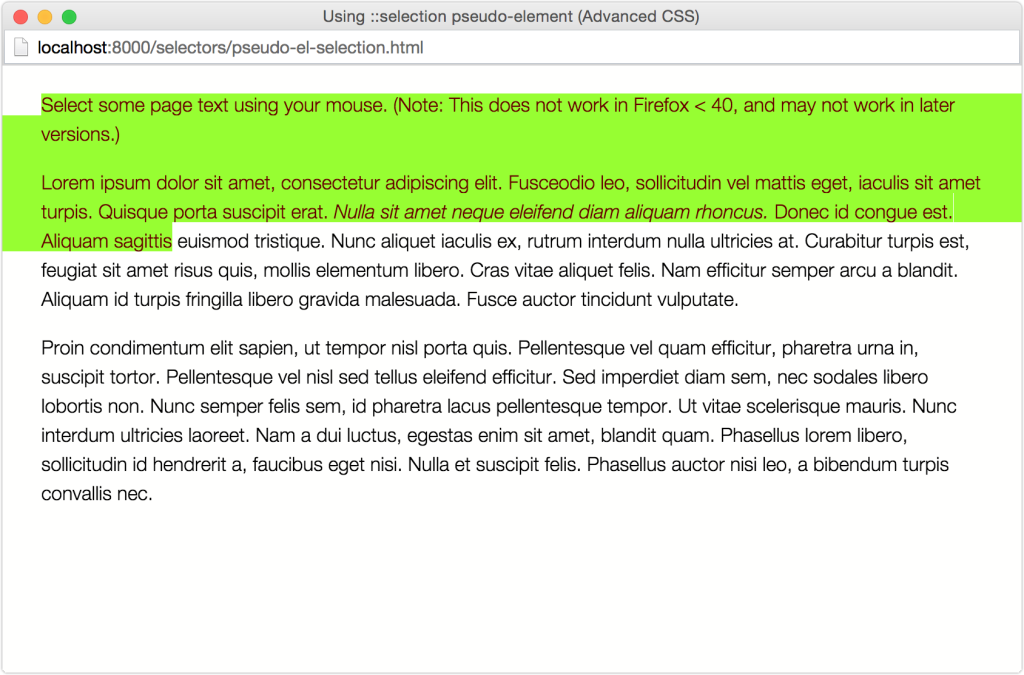
In practical terms, only color and background-color have been implemented in multiple browsers. Let’s look at an example:
::selection {
    background: #9f0;
    color: #600;
}
This CSS adds a lime green background to any element the user highlights, and changes the text color to a deep red. The example works in every browser that supports ::selection, and you can see the effect below.
Tip: Color Combinations
When selecting foreground and background colors to use with ::selection, keep accessibility in mind. Some color combinations fail to generate enough contrast to be read by low-vision users. Other color combinations may be illegible for color-blind users. Be sure to use a contrast checker and color-blindness simulator before selecting your final colors.
The ::spelling-error and ::grammar-error pseudo-classes are also defined by the Pseudo-Elements Module. When implemented, these pseudo-classes will let us style text that is misspelled or ungrammatical according to the browser’s dictionary.
[1] The Mozilla Developer Network entry for line-height explains why unitless values are the way to go.
[2] The specification actually uses the phrase “typographic letter unit.” This includes Unicode letters and numbers, but also characters used in East Asian and Middle Eastern writing systems.
[3] In Firefox, this pseudo-element requires a –moz- prefix, like so ::-moz-selection.
Frequently Asked Questions about CSS Pseudo-Elements
What are the different types of CSS pseudo-elements?
CSS pseudo-elements are used to style specific parts of an element. There are several types of pseudo-elements, including ::before, ::after, ::first-letter, ::first-line, and ::selection. The ::before and ::after pseudo-elements are used to insert content before or after the content of an element. The ::first-letter and ::first-line pseudo-elements are used to style the first letter or line of a text block. The ::selection pseudo-element is used to change the appearance of the portion of a document that has been highlighted by the user.
How do I use the ::before and ::after pseudo-elements?
The ::before and ::after pseudo-elements are used to insert content before or after the content of an element. They are often used to add decorative features to an element. To use these pseudo-elements, you need to specify the content property. This property is used to specify the content to insert. It can contain text, an image, or nothing at all. Here’s an example of how to use the ::before pseudo-element:p::before {
content: "Read this - ";}
In this example, the text “Read this – ” will be inserted before the content of every paragraph.
Can I use pseudo-elements with any CSS selector?
Yes, pseudo-elements can be used with any CSS selector. However, they are not part of the element’s content; they are used to add special effects to the element. For example, you can use the ::first-letter pseudo-element with a paragraph selector to style the first letter of every paragraph.
What is the difference between pseudo-elements and pseudo-classes?
Pseudo-elements and pseudo-classes are both types of CSS selectors that allow you to style specific parts of an element. However, they are used for different purposes. Pseudo-classes are used to define a special state of an element, such as when it is hovered over or focused. Pseudo-elements, on the other hand, are used to style specific parts of an element, such as the first letter or line of text.
How do I use the ::selection pseudo-element?
The ::selection pseudo-element is used to change the appearance of the portion of a document that has been highlighted by the user. For example, you can change the background color and the text color of the selected text. Here’s an example:::selection {
background-color: yellow;
color: black;}
In this example, the selected text will have a yellow background and black text.
Can I use multiple pseudo-elements on the same element?
Yes, you can use multiple pseudo-elements on the same element. For example, you can use the ::before and ::after pseudo-elements on the same element to insert content before and after the content of the element.
Are pseudo-elements supported in all browsers?
Most modern browsers support pseudo-elements. However, older versions of some browsers may not support all pseudo-elements. It’s always a good idea to check the browser compatibility before using a pseudo-element.
Can I use pseudo-elements to add HTML content?
No, pseudo-elements can only be used to insert text or images. They cannot be used to insert HTML content.
Can I animate pseudo-elements?
Yes, you can animate pseudo-elements using CSS animations and transitions. This can be used to create interesting visual effects.
Can I use pseudo-elements to create shapes?
Yes, you can use pseudo-elements to create shapes. By using the ::before and ::after pseudo-elements and the CSS properties for width, height, and background, you can create a variety of shapes such as squares, circles, and triangles.
Tiffany B. Brown is a freelance web developer and technical writer based in Los Angeles. Brown offers web development and consulting services to larger agencies and small businesses. A former member of the Opera Software developer relations team, Brown is also co-author of SitePoint's JumpStart HTML5 book. She sporadically writes about web development technology on her blog. You can follow her on Twitter at @webinista.